Windows 11 Clean Install: Complete Step-by-Step Guide (USB Method)

Callum specializes in breaking down complex technology topics into easy-to-understand guides. He has a background in computer science and technical writing.
Want to do a Windows 11 clean install from scratch? This step-by-step guide teaches you how to install Windows 11 from USB, from creating installation media to initial setup. Learn the correct method for a clean Windows 11 installation that maximizes your PC's performance.
📋 Table of Contents
What is a Windows 11 Clean Install?
A Windows 11 clean install means completely wiping your hard drive and installing the operating system from scratch. Unlike an upgrade, this removes all previous files, programs, and settings.
Advantages
- • Optimal performance without bloatware
- • Eliminates persistent malware and viruses
- • Fixes system errors
- • Completely fresh start
Considerations
- • You lose all data on the disk
- • Must reinstall all programs
- • Requires prior backup
- • Takes 30-60 minutes to complete
Prerequisites for Installation
Before starting the Windows 11 USB installation, make sure you have everything you need:
USB Drive (8GB minimum)
Preferably USB 3.0 for faster installation. All its contents will be erased.
Windows 11 Compatible PC
TPM 2.0, Secure Boot, 4GB RAM minimum, 64GB storage, compatible processor.
Backup of Important Data
Save documents, photos, and files to external drive or cloud. Clean install erases EVERYTHING.
Internet Connection
Required to download drivers and complete initial setup.
Windows 11 Minimum Requirements:
How to Create a Bootable Windows 11 USB
The first step is to create a Windows 11 installation USB. Microsoft provides a free tool for this:
Download the Media Creation Tool
Go to microsoft.com/software-download/windows11 and download the "Media Creation Tool".
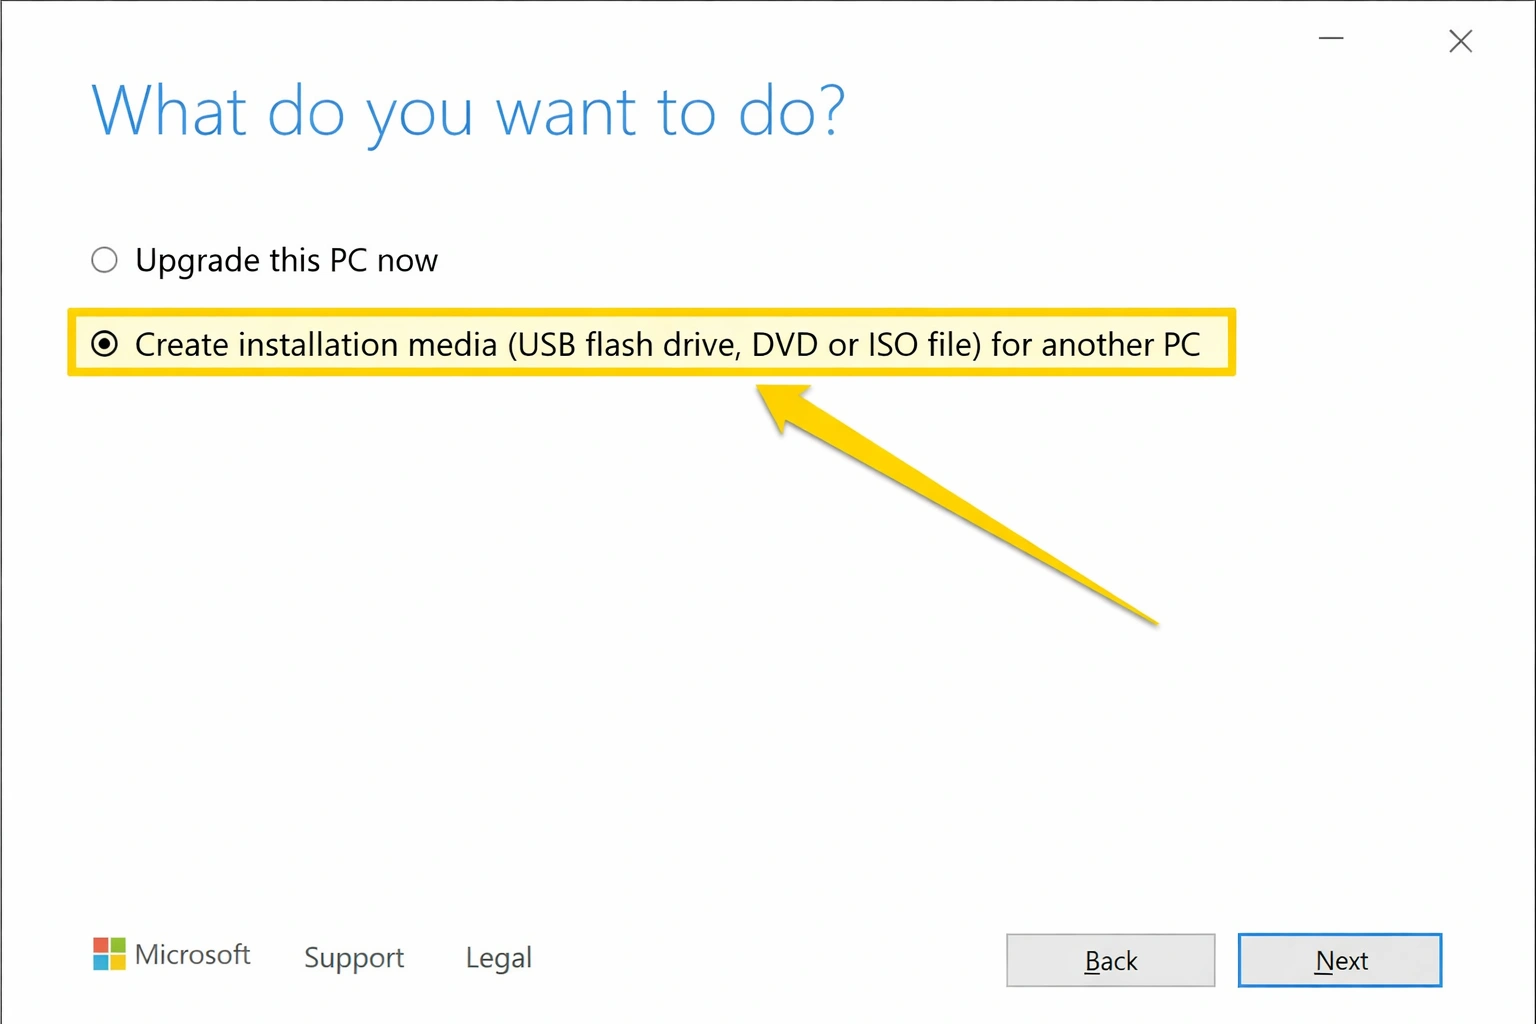
Run the Tool
Accept the license terms and select "Create installation media for another PC".
Select Language and Edition
Choose your preferred language. Edition (Home/Pro) is selected during installation with your product key.
Select USB Flash Drive
Choose "USB flash drive" and select your USB from the list. All its contents will be erased.
Wait for Download
The tool will download Windows 11 and create the bootable USB. This can take 20-30 minutes.
Configure BIOS/UEFI to Boot from USB
To boot from the Windows 11 USB, you need to configure your BIOS/UEFI:
How to access BIOS/UEFI:
- • Dell: Press F2 or F12 at startup
- • HP: Press F10 or Esc at startup
- • Lenovo: Press F2 or Fn+F2 at startup
- • ASUS: Press F2 or Del at startup
- • MSI: Press Del at startup
- • Acer: Press F2 or Del at startup
Important: Verify These Settings
- • Secure Boot: Must be enabled for Windows 11
- • TPM: Must be enabled (may be called PTT on Intel or fTPM on AMD)
- • Boot Order: Place USB first in the boot list

Windows 11 Installation Process Step by Step
With the USB connected and PC configured to boot from it, follow these steps:
Boot from USB
Restart the PC with the USB connected. You should see the Windows 11 logo loading.
Select Language and Keyboard
Choose your language, time/currency format, and keyboard layout. Click "Next".
Click "Install now"
The installation process will start. This may take a few seconds.
Enter Your Product Key
Enter your 25-character Windows 11 key. You can also select "I don't have a product key" and activate later.
Select Edition
Choose Windows 11 Home or Windows 11 Pro according to your license. Accept the license terms.
Select "Custom: Install Windows only"
This option performs the clean install. The "Upgrade" option keeps files.
Select Installation Disk
For a completely clean install, delete all partitions on the main disk and select "Unallocated Space".
Wait for Installation
Windows will copy files, install features, and restart several times. This takes 15-30 minutes.

Windows 11 Initial Setup (OOBE)
After installation, Windows 11 will guide you through initial setup:
- Country or region: Select your geographic location.
- Keyboard layout: Confirm or change your keyboard layout.
- Network connection: Connect to WiFi or Ethernet (required to continue).
- Device name: Assign a name to your PC.
- Microsoft account: Sign in or create a Microsoft account.
- Windows Hello: Set up PIN, fingerprint, or facial recognition.
- Privacy settings: Adjust telemetry options and permissions.

How to Activate Windows 11 After Installation
If you didn't enter the key during installation, activate Windows 11 now:
- Go to Settings → System → Activation
- Click "Change product key"
- Enter your 25-character key
- Click "Next" to activate
Essential Post-Installation Steps
After completing the Windows 11 clean install, perform these tasks:
Frequently Asked Questions
Do I lose my license with a clean install?
No, if your PC already had Windows activated with a digital license, it will automatically reactivate when you connect to the internet with the same Microsoft account.
Can I install Windows 11 without TPM 2.0?
Officially no, but unsupported methods exist. However, you might lose access to future updates.
How long does the installation take?
Typically 30-60 minutes, depending on your USB and hard drive speed. With NVMe SSD and USB 3.0, it can be less than 20 minutes.