Excel Macros for Beginners: Automate Your Spreadsheets (No Coding Required)

Callum specializes in breaking down complex technology topics into easy-to-understand guides. He has a background in computer science and technical writing.
Learn how to automate repetitive tasks in Excel using macros without any coding knowledge. This beginner's guide will teach you how to record, edit, and run macros to save hours of work.
What Are Excel Macros?
Excel macros are automated sequences of commands that execute repetitive tasks with a single click. Think of them as recordings of your actions that you can replay whenever you want.
While macros use VBA (Visual Basic for Applications) behind the scenes, you don't need to know programming to create them. Excel includes a recording feature that captures your actions and automatically converts them into code.
Benefits of Using Macros:
- • Save hours on repetitive tasks
- • Reduce human errors
- • Standardize processes
- • Increase productivity
- • No programming knowledge required
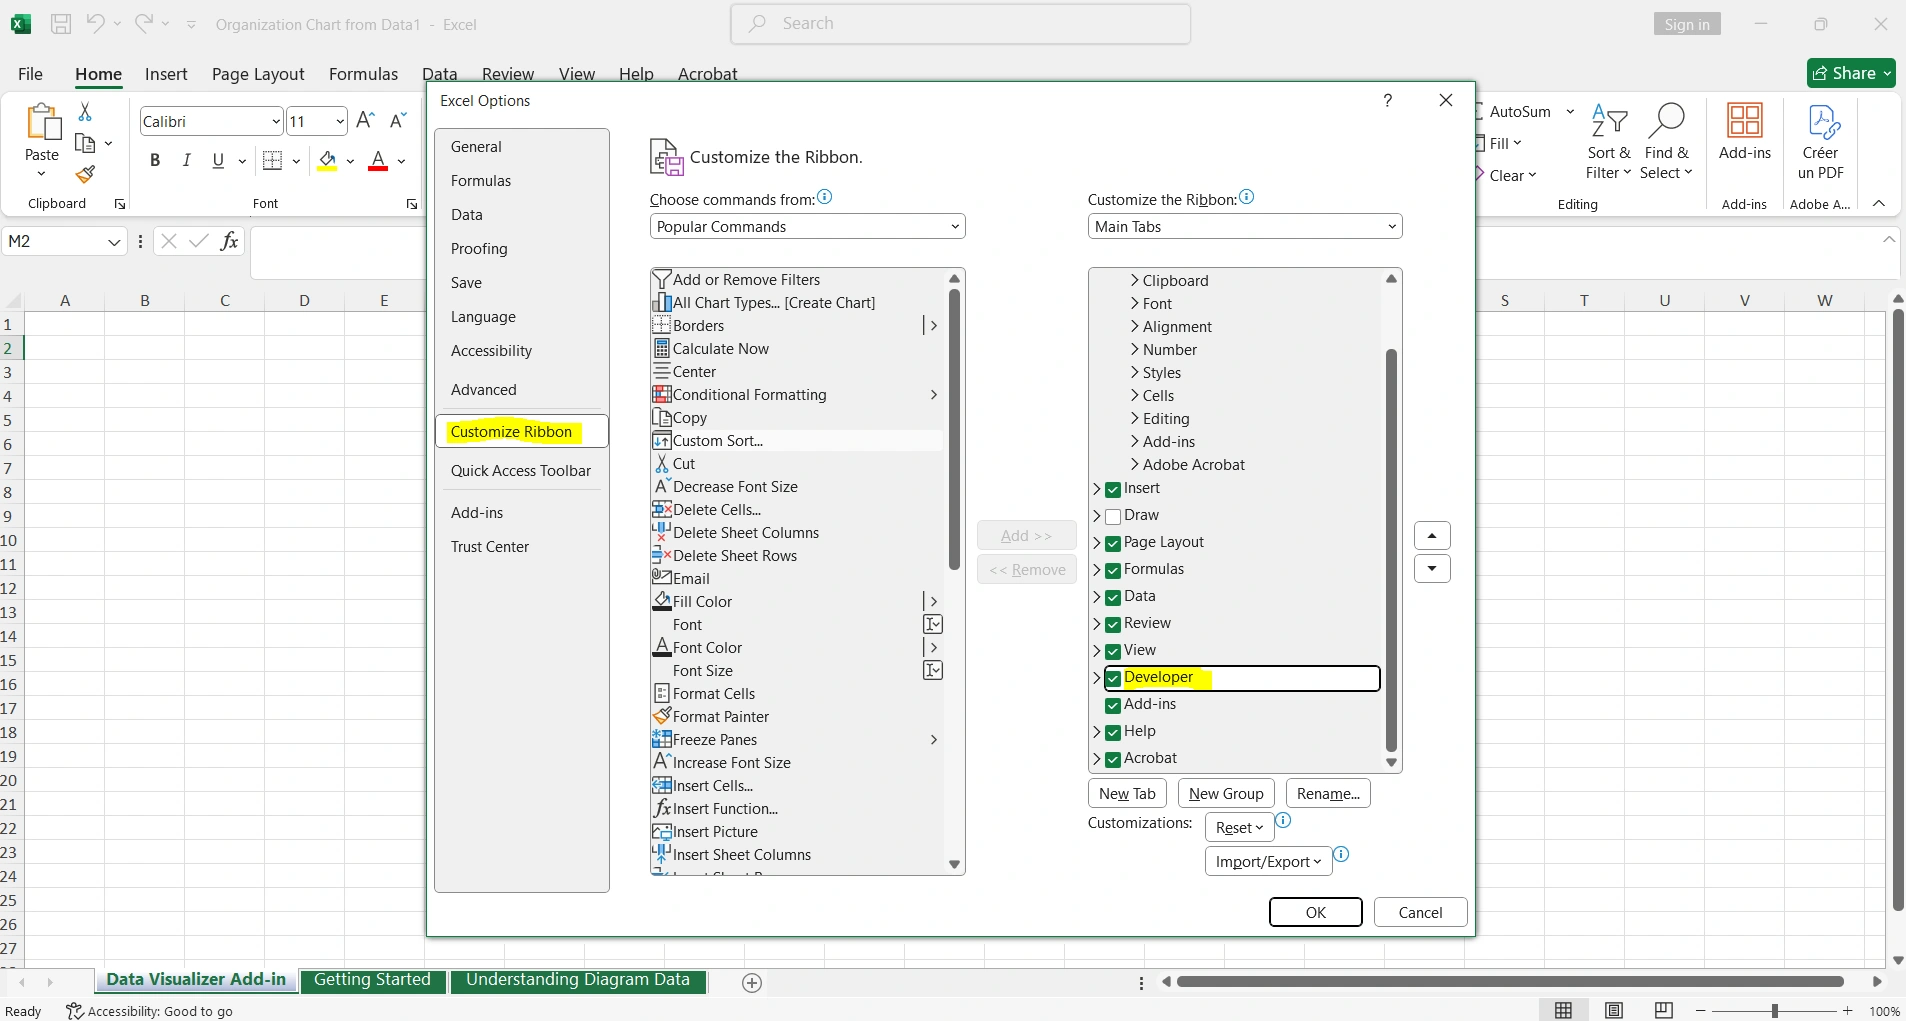
Enable the Developer Tab
Before creating macros, you need to enable the "Developer" tab in Excel, which is hidden by default:
Steps to Enable:
- 1. Click File → Options
- 2. Select Customize Ribbon
- 3. In the right panel, check the Developer box
- 4. Click OK
You'll now see the "Developer" tab in the ribbon, where you'll find all the macro tools.
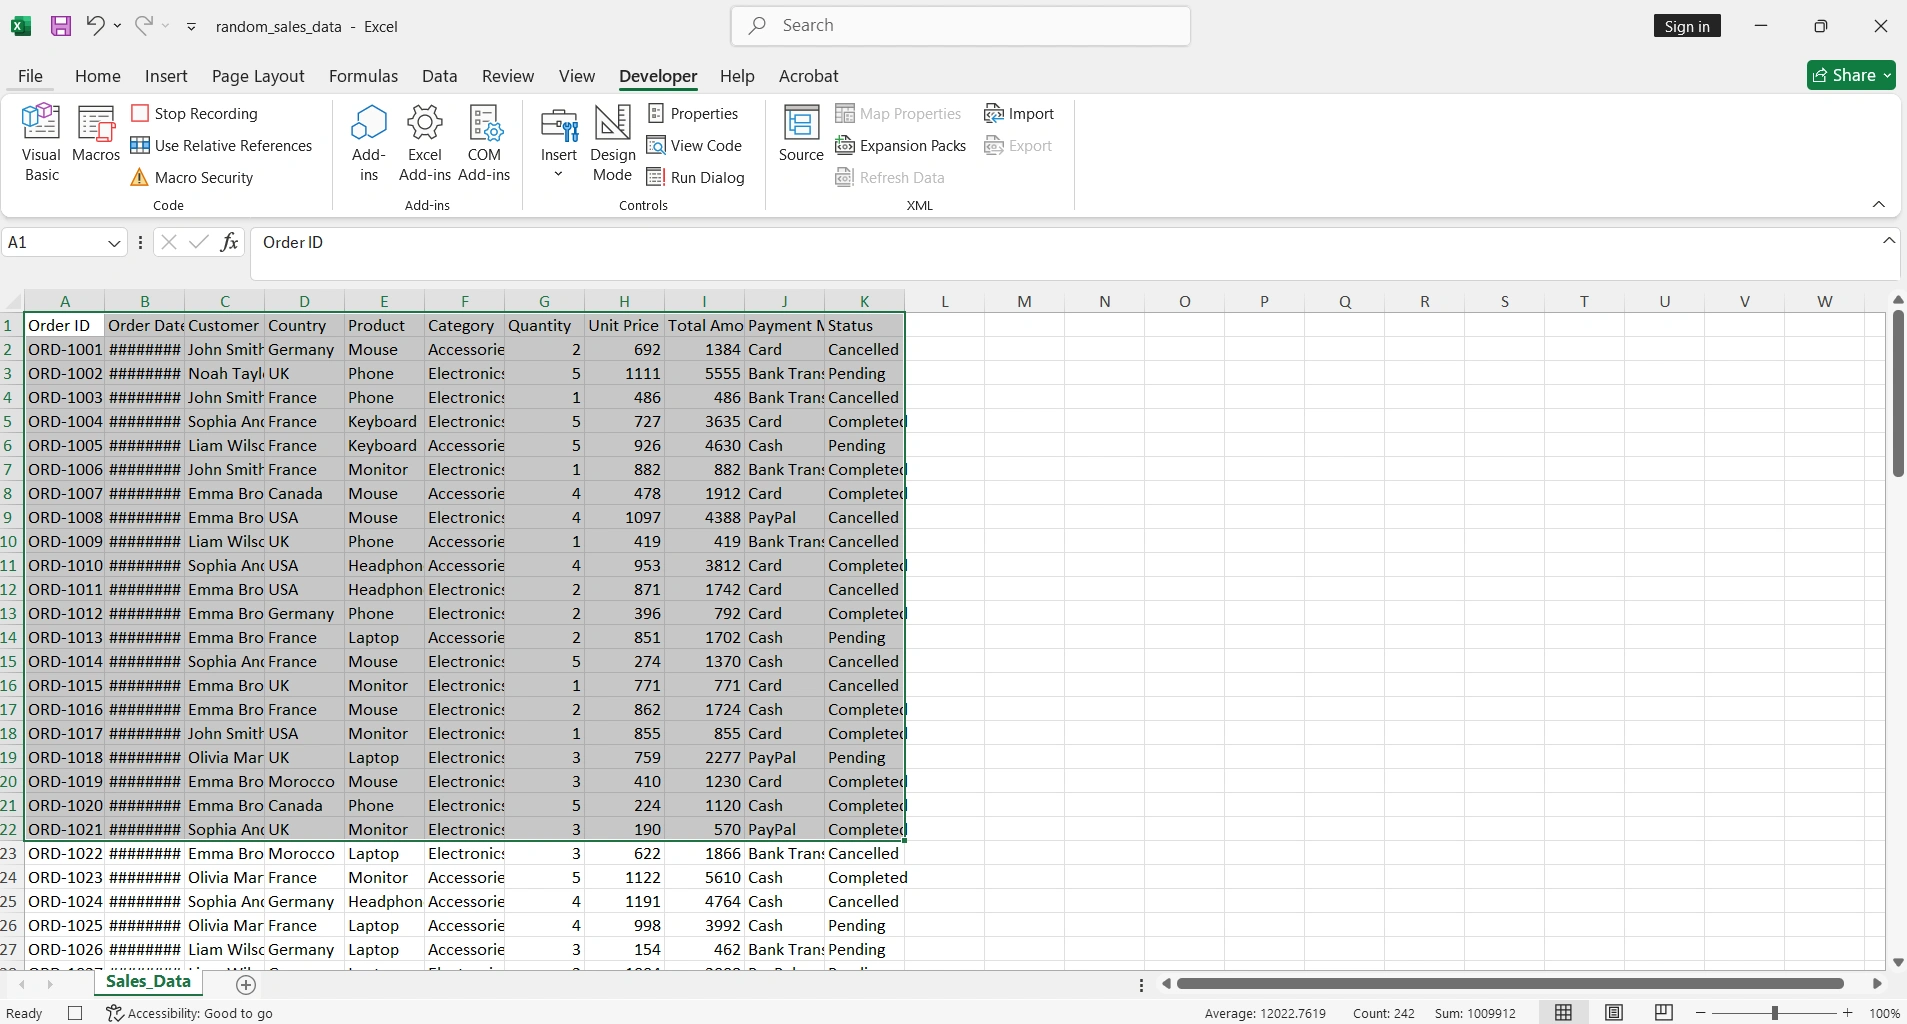
Record Your First Macro
Let's create a simple macro that formats data automatically:
Example: Formatting Macro
- 1. Go to Developer → Record Macro
- 2. Name the macro (e.g., "QuickFormat")
- 3. Assign a keyboard shortcut (optional, e.g., Ctrl+Shift+F)
- 4. Select where to save it (This Workbook or Personal)
- 5. Click OK to start recording
- 6. Perform the actions you want to automate
- 7. Click Stop Recording
💡 Important Tip
Plan your actions before recording. The macro will record EVERYTHING you do, including mistakes. If you make an error, it's better to stop and start over.

Run Macros
There are several ways to run a saved macro:
Method 1: Keyboard Shortcut
If you assigned a shortcut when creating the macro, simply press it (e.g., Ctrl+Shift+F).
Method 2: From the Menu
Go to Developer → Macros, select the macro and click Run.
Method 3: Custom Button
Insert a shape or button and assign the macro to run it with one click.
Method 4: Alt+F8
Press Alt+F8 to quickly open the macros dialog.
10 Useful Macros for Beginners
1. Clear Formatting
Removes all formatting from selected cells.
Actions to record: Select cells → Home → Clear → Clear Formats
2. Insert Date and Time
Inserts the current date and time in the active cell.
Actions to record: Type =NOW() → Enter
3. Professional Table Format
Applies borders, colors, and header formatting.
Actions to record: Select range → Apply borders → Header color → Bold
4. Auto-fit Column Width
Automatically adjusts the width of all columns.
Actions to record: Select all cells → Double-click column border
5. Delete Empty Rows
Finds and deletes all empty rows.
Actions to record: Go To Special → Blanks → Delete rows
6. Convert to Uppercase
Converts selected text to uppercase.
Use the UPPER() function in a helper column
7. Create Backup Copy
Saves a copy of the file with date.
Actions to record: Save As → Add date to filename
8. Print Selected Range
Configures and prints only the selected area.
Actions to record: Set print area → Page setup → Print
9. Highlight Duplicates
Applies color to cells with duplicate values.
Actions to record: Conditional Formatting → Highlight Duplicates
10. Sort by Column
Sorts data A-Z by a specific column.
Actions to record: Select data → Sort → Choose column
Save Workbooks with Macros
Regular Excel files (.xlsx) don't save macros. You must use a special format:
Macro-Enabled Formats:
- .xlsm - Excel Macro-Enabled Workbook (most common)
- .xlsb - Excel Binary Workbook (faster for large files)
- .xltm - Macro-Enabled Template
⚠️ Security Warning
When opening .xlsm files from unknown sources, Excel will show a security warning. Only enable macros from trusted files, as they can contain malicious code.
Personal Macro Workbook
The Personal Macro Workbook (PERSONAL.XLSB) lets you use your macros in any Excel file:
Advantages of Personal Workbook:
- • Macros are available whenever you open Excel
- • No need to copy macros between files
- • Loads automatically in the background
- • Perfect for frequently used macros
To save a macro to the Personal Workbook, select "Personal Macro Workbook" in the "Store macro in" option when recording.
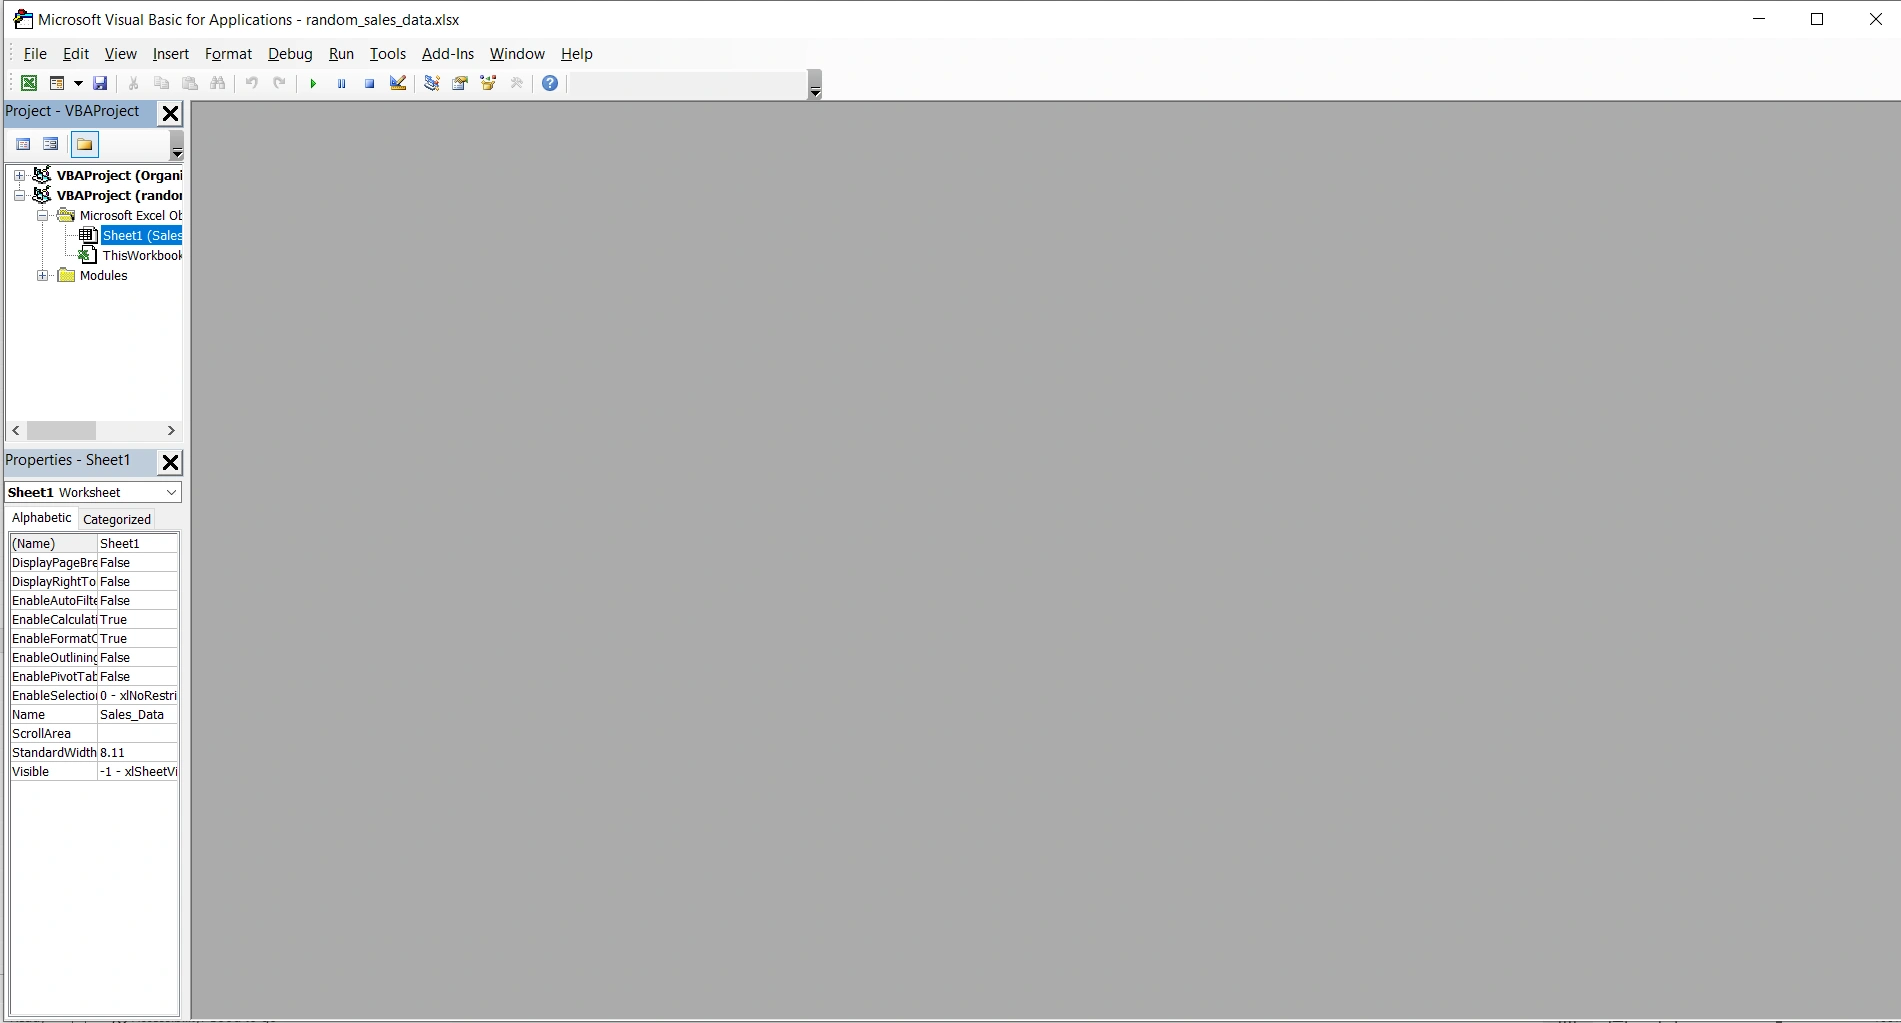
Edit Macros (Optional)
While you don't need to know VBA, you can make small modifications to recorded code:
Access the VBA Editor:
- 1. Press Alt+F11 to open the VBA Editor
- 2. In the left panel, find your macro module
- 3. Double-click to view the code
- 4. Make changes and close the editor
Simple Modifications:
- • Change colors (look for RGB numbers)
- • Modify cell ranges (e.g., "A1:B10")
- • Adjust numerical values
- • Change sheet names in quotes
Troubleshooting Common Issues
Macro doesn't work correctly
Verify the initial selection is correct. Recorded macros often depend on cell position. Use absolute references ($A$1) instead of relative ones.
Security warning when opening
Go to File → Options → Trust Center → Trust Center Settings → Macro Settings, and select "Disable with notification".
Macro disappeared
You probably saved the file as .xlsx. Save again as .xlsm to preserve the macros.
Can't see the Developer tab
Follow the steps in the "Enable the Developer Tab" section to activate it from Excel options.
Best Practices for Macros
✓ Do
- • Name macros descriptively
- • Document what each macro does
- • Test on sample data first
- • Save backup copies
- • Use memorable keyboard shortcuts
✗ Avoid
- • Running macros without understanding them
- • Using macros from unknown sources
- • Overwriting macros without backup
- • Creating overly long macros
- • Forgetting to save as .xlsm
Conclusion
Excel macros are a powerful tool that anyone can use without programming knowledge. With the recording feature, you can automate repetitive tasks and save hours of manual work.
Start with simple macros like formatting and data cleanup, and gradually explore more complex automations. Remember to always save your files in .xlsm format and maintain backups.
Recommended Next Steps:
- 1. Enable the Developer tab today
- 2. Record your first formatting macro
- 3. Practice with the 10 suggested macros
- 4. Create your Personal Macro Workbook
- 5. Explore VBA tutorials when you're ready